Mounting the Map
An often-asked question is “How do I mount the map?”
By FAR the easiest, least expensive, and quickest method is simply by using push pins. Before you dismiss that idea, please be aware that there are many very cool looking pushpins that will even enhance the attractiveness of your map. You can see our suggestions for those at www.redeftmapping.com/pushpins .
To mount the map using pushpins, we recommend a pushpin along both the top edge and the bottom edge roughly every 24″, and also one in the center of each map side. This will work out to 14 pushpins in total (6 each along the top and bottom edges, and 1 each per side). The pushpins usually should be placed in the center of the outermost white borders around the map. Most maps that we have shipped have nearly invisible pushpin guides that are embedded in the map to help you place them.
To find these guides look very carefully along the outer edge of the outermost black border of the map. Look at around 24 1/4″ from the left edge of the map to find the first one. It will appear as a small white chunk taken out of the black border. It is very small so as not to detract from the map appearance, but you can see it if you look closely. Below is a blow-up image of what it looks like:
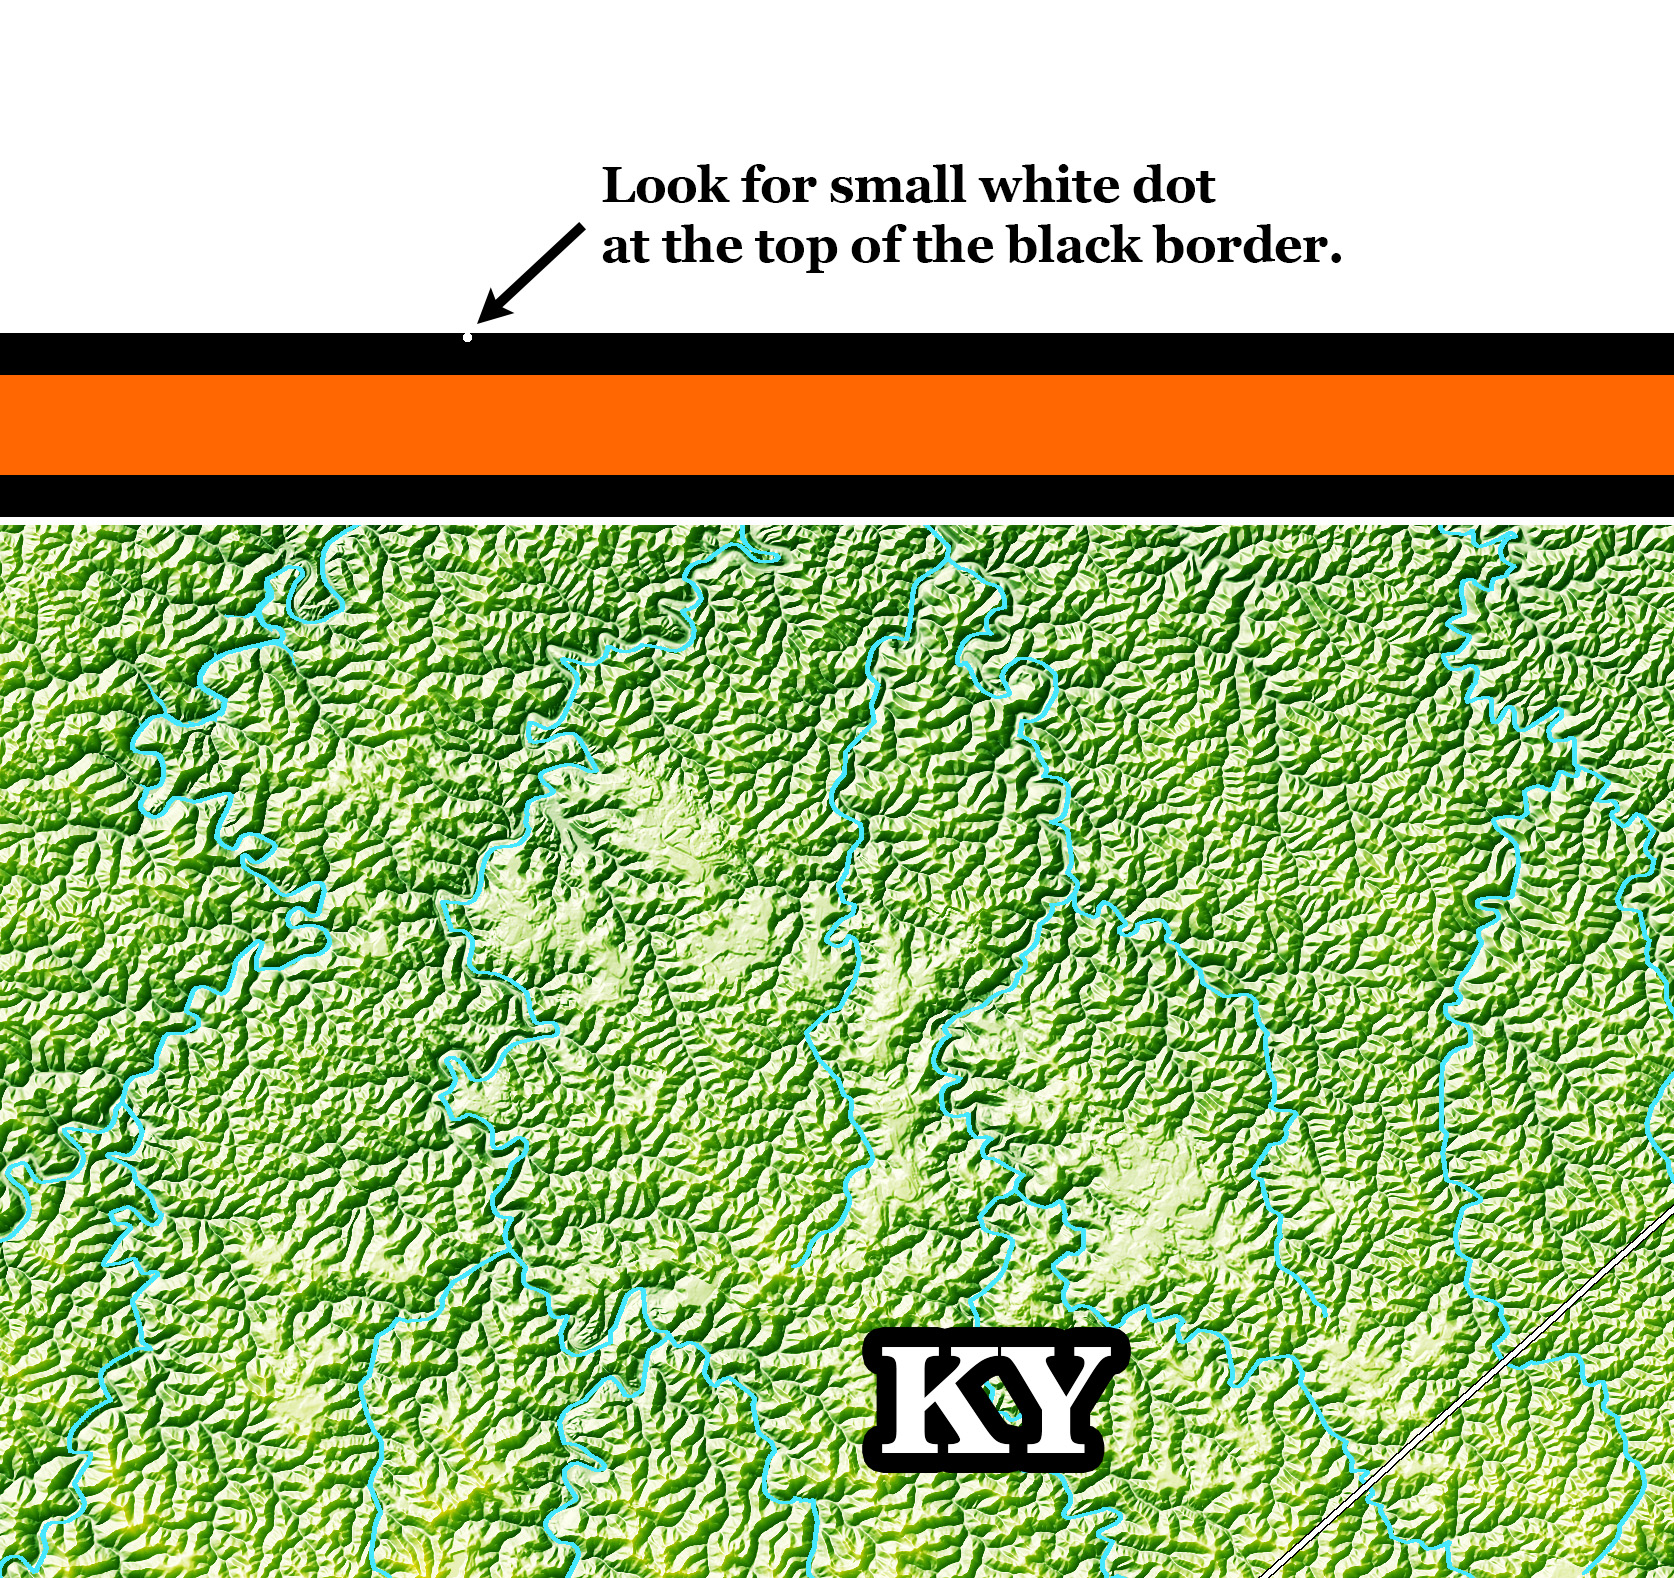
Put the actual pushpin centered in the outermost white border near the guide dot.
After you find that first dot, the other ones are spaced approximately 23 7/8 inches apart. The reason for this spacing is that the very first and very last pushpins will be located not at the edge of the map, but rather about 3/8″ from the edge of the map, which will be centered left-to-right in leftmost white border and rightmost white border. This spacing keeps the pushpins the same distance apart.
The guide dots along the bottom edge of the map are exactly below the top guide dots. And, finally, there is a single guide dot halfway down each side of the map. You will need the pushpins along the bottom and side of the map to keep it taut against the wall.
In each corner of the map, there is no guide dot. In the corners, center the pushpin in the center of the horizontal and vertical outermost white borders, as shown in the image below:

Now, to mounting the map itself: First, have a very clear idea of where you want the map on your wall. It is meant to be mounted at eye level so you can easily walk along the length of the map at eye level, and get up close to it to see the incredible detail. A 6′ level is handy as well, or you can measure up from the floor to make sure the ends are level. But the eye is the best guide: Sometimes floors are uneven, and you have to adjust so that it looks level, even if it is not.
First, have everyone involved wash and dry their hands thoroughly! The map can be soiled by dirty hands, and attempting to clean it will probably remove ink from the map. Ideally you will have THREE folks on hand to help do this: One person will be at the left edge of the map holding that in place. The second person will be stretching out the map on the right edge, and the third person will actually be pushing in the pins.
You can also do this with just two people, by having the second person unroll the map along the wall and pushing in the pins as they go, while the other person holds the left edge of the map. But the 3 person method is much better, as you can stretch out the map first and have someone step back from it and see how it looks on the wall before placing pins.
After you get the top pins placed, then pull gently on the lower edge of the map to make it taut, then put in the lower pins. Usually it is best to get in the two lower corner ones first to make sure the map is taut, then fill in the other lower pins. Finally, add the two pins in the center of each side. Done!
Using this method you can get your map up right away, which is recommended!
As for “framing” the map, this is neither recommended nor necessary! The inks used on your map are archival pigmented fade-resistant inks, and HP guarantees permanence for non-fade over a >100 year interval with no covering whatsoever. So, no glass or other covering is necessary to protect from fading. However, the map is not made for outdoor mounting! It is not weather resistant.
If you do choose to frame your map, it will likely be very expensive, due to the very large size (and also consider how to transport a 10′ rigid map from the frame shop back to your home!). To date, only two customers have framed their maps: One hiker had a professional frame shop do the job (price unknown), and the other hiker did the framing himself at his home.
If you want a somewhat more permanent map display without actual framing, you could put grommets in the map, and then put screws through the grommets into your wall. If you have a wood paneled wall, you can still use the 24″ spacing. But, if you are going to screw the map into studs in a home, be aware that these are normally on 16″ centers, and will have to be located in advance. In that case, the placement of your grommets will depend on where you plan to place the map on the wall, and also where the studs lie under the map.
As for the grommets themselves, we can recommend one, and only one grommet from the many we have tried.
We recommend the Dritz ¼” size 2-Part Eyelets, part number 730-65-T, which also has the small anvil and setter tool needed included in the package. There are only 15 grommets in that kit, though, so if you need more, buy the Dritz kit 730-65, which also has 15 eyelets, but without the tool. The kits are available with either a chrome or brass finish (we recommend the chrome ones for looks). They are just the right size for the map, and work well. Other eyelets either just don’t look nice, don’t work well, or install horribly and damage the canvas. Use the tool that comes in the package, and do not use the Dritz “pliers” type tool that they sell separately– it makes a horrible mess of these eyelets!
We highly recommend practice on a scrap piece of cloth before trying this on your canvas! In particular, note that the large grommet piece is put through the map from “front to back”. In other words, with the map image facing you, put that piece through the map. Then you will have to flip the map over to put on the nylon washer and the final ring. Make sure the final ring is “dome side up”, as per the instructions on the back of the Dritz package. If you end up with a grommet disaster, let me know, and we can mail you small piece of canvas to help repair it. You could use flexible fabric glue to glue the small piece to the back of the canvas, and then re-grommet. But, please avoid this by practicing on other cloth first, or just use pushpins (recommended) !
If none of the above options suit you, we can also suggest 3M command strips, which are widely available at Home Depot. You would use the Medium sized velcro types, which consist of two parts of mating velcro. One part attaches to the wall with the 3M removable strip, and the other part would attach to the map. 3M states that the strips mounted to the wall can be removed without paint damage, but you must be very slow and careful if you choose to do that. As described above, you would use 14 of these pairs at the map locations suggested above. The 3M medium velcro command strips are available in packs of 16, which is perfect. They come in black or white versions, and you would want the white ones.